Table of ContentsIntroductionCapturing Precious Moments: A Guide to Brisbane's Newborn PhotographyCh

Mastering Proper Exposure in Photography: Essential Tips for Newbies - Unlock the Secrets to Perfectly Exposed Shots
Mastering Proper Exposure in Photography: Essential Tips for Newbies
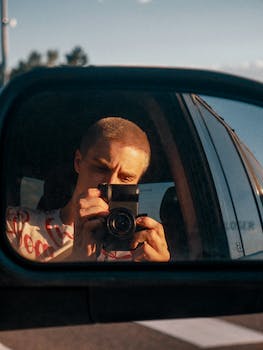
Proper exposure is a fundamental aspect of photography that can greatly impact the quality and impact of your images. Whether you are a beginner or looking to improve your skills, understanding how to achieve the right exposure is crucial. This article will provide essential tips and techniques to help newbies master proper exposure in photography. By learning about exposure settings, metering modes, and understanding the exposure triangle, you will be able to capture well-exposed photographs that truly showcase your subject and artistic vision.
Mastering Proper Exposure in Photography: Essential Tips for Newbies
Understanding the Exposure Triangle: Aperture, Shutter Speed, and ISO
When it comes to photography, understanding the concept of exposure is crucial. Proper exposure is the foundation of a well-executed photograph, and it can make or break the final result. For beginners, grasping the exposure triangle is essential. The exposure triangle consists of three key elements: aperture, shutter speed, and ISO. In this article, we will delve into each of these components and explore how they work together to achieve the perfect exposure.
Aperture, the first element of the exposure triangle, refers to the size of the opening in the lens through which light enters the camera. It is measured in f-stops, with smaller numbers indicating a larger opening and vice versa. Aperture not only controls the amount of light entering the camera but also affects the depth of field. A wider aperture (smaller f-stop) results in a shallow depth of field, where the subject is in focus while the background is blurred. On the other hand, a narrower aperture (larger f-stop) increases the depth of field, resulting in a sharper focus throughout the image. Understanding how aperture affects both light and depth of field is crucial for achieving the desired effect in your photographs.
Moving on to shutter speed, this element determines the length of time the camera's shutter remains open, allowing light to reach the camera's sensor. Shutter speed is measured in fractions of a second, such as 1/100 or 1/1000. A faster shutter speed, such as 1/1000, freezes motion and is ideal for capturing fast-moving subjects. Conversely, a slower shutter speed, like 1/30, allows for longer exposure times, resulting in motion blur. Understanding how to adjust shutter speed is essential for capturing action shots or creating intentional blur effects in your photographs.
The third element of the exposure triangle is ISO, which refers to the sensitivity of the camera's image sensor to light. A lower ISO, such as 100, is less sensitive to light and produces images with less noise or grain. On the other hand, a higher ISO, like 1600, increases the sensor's sensitivity, allowing for better performance in low-light conditions but potentially introducing more noise. It is important to find the right balance between ISO and the other elements of the exposure triangle to achieve the desired image quality.
Now that we have explored each element of the exposure triangle, it is crucial to understand how they work together. Aperture, shutter speed, and ISO are interconnected, and adjusting one affects the others. For example, if you want to capture a well-exposed image in a low-light situation, you can widen the aperture to allow more light in. However, this may result in a shallower depth of field, so you may need to adjust the focus accordingly. Alternatively, you can increase the ISO to make the sensor more sensitive to light, but this may introduce more noise. It is a delicate balance that requires practice and experimentation to master.
In conclusion, understanding the exposure triangle is essential for mastering proper exposure in photography. Aperture, shutter speed, and ISO work together to control the amount of light reaching the camera's sensor and determine the overall look and feel of your photographs. By grasping the relationship between these elements and experimenting with different settings, you can achieve the perfect exposure and create stunning images. So, grab your camera, start practicing, and unlock the potential of the exposure triangle in your photography journey.

Achieving Proper Exposure in Different Lighting Conditions
Proper exposure is one of the fundamental aspects of photography that every newbie must master. It refers to the balance between the amount of light that enters the camera and the sensitivity of the camera's image sensor. Achieving proper exposure is crucial because it determines the overall brightness and clarity of the image. However, it can be quite challenging, especially when shooting in different lighting conditions. In this article, we will explore some essential tips to help newbies master proper exposure in various lighting situations.
Firstly, it is important to understand the concept of exposure triangle, which consists of three elements: aperture, shutter speed, and ISO. Aperture refers to the size of the lens opening, which controls the amount of light that enters the camera. Shutter speed, on the other hand, determines the duration of time that the camera's shutter remains open, allowing light to reach the image sensor. Lastly, ISO measures the sensitivity of the image sensor to light. By adjusting these three elements, photographers can achieve proper exposure in different lighting conditions.
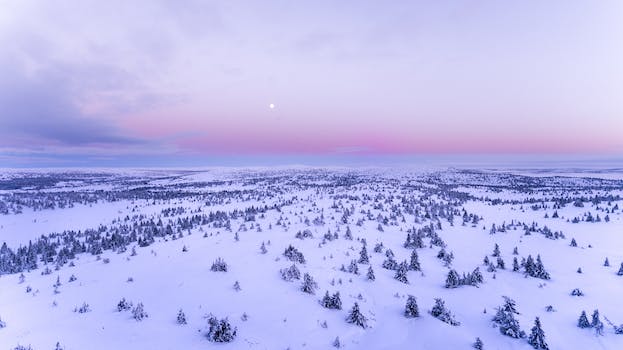
When shooting in bright sunlight, it is crucial to consider the aperture setting. A smaller aperture, represented by a higher f-number, will reduce the amount of light entering the camera, preventing overexposure. Additionally, using a faster shutter speed will help capture sharp images and prevent any motion blur caused by the bright light. However, it is important to note that a faster shutter speed may require a higher ISO setting to maintain proper exposure. Therefore, finding the right balance between these three elements is essential.
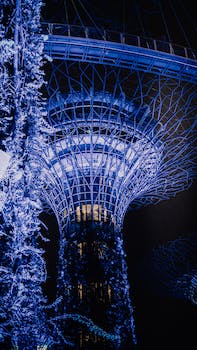
On the other hand, shooting in low light conditions presents a different set of challenges. In such situations, it is important to increase the camera's sensitivity to light by adjusting the ISO setting. However, a higher ISO setting can introduce digital noise, which can degrade the image quality. To minimize noise, it is recommended to use a wider aperture to allow more light into the camera. Additionally, using a slower shutter speed can help capture more light, but it may also introduce motion blur. Therefore, using a tripod or other stabilization techniques is crucial to maintain sharpness in low light conditions.
When shooting in mixed lighting conditions, such as indoors with natural and artificial light sources, it is important to consider the color temperature of the light. Different light sources emit light with varying color temperatures, which can affect the overall color balance of the image. To achieve proper exposure in such situations, it is recommended to use a custom white balance setting or adjust it during post-processing. This will ensure that the colors in the image appear natural and accurate.
In conclusion, achieving proper exposure in different lighting conditions is a crucial skill that every newbie photographer must master. By understanding the exposure triangle and adjusting the aperture, shutter speed, and ISO settings accordingly, photographers can capture well-exposed images. Whether shooting in bright sunlight, low light conditions, or mixed lighting situations, finding the right balance between these elements is essential. Additionally, considering factors such as color temperature and using stabilization techniques can further enhance the quality of the images. With practice and experimentation, newbies can gradually develop their skills in mastering proper exposure and capture stunning photographs in any lighting condition.
Mastering Proper Exposure in Photography: Essential Tips for Newbies
Photography is an art form that requires a keen eye for detail and a deep understanding of various technical aspects. One of the most crucial elements in photography is exposure, which refers to the amount of light that enters the camera and hits the image sensor. Proper exposure is essential for capturing stunning photographs, as it determines the brightness, contrast, and overall quality of the image. For beginners, understanding exposure compensation is a fundamental step towards mastering proper exposure.
Exposure compensation is a feature found in most modern cameras that allows photographers to adjust the exposure settings manually. It is particularly useful when dealing with challenging lighting conditions, such as scenes with extreme highlights and shadows. By using exposure compensation, photographers can balance the exposure and ensure that both the highlights and shadows are properly exposed.
When faced with a high-contrast scene, such as a landscape with a bright sky and dark foreground, the camera's built-in light meter may struggle to accurately expose the image. This is where exposure compensation comes into play. By increasing the exposure compensation, the camera will let in more light, resulting in a brighter image. Conversely, decreasing the exposure compensation will reduce the amount of light, resulting in a darker image.
To use exposure compensation effectively, it is crucial to understand the concept of dynamic range. Dynamic range refers to the range of brightness levels that a camera can capture, from the darkest shadows to the brightest highlights. Different cameras have different dynamic ranges, and understanding your camera's capabilities will help you make informed decisions when adjusting exposure compensation.
When using exposure compensation, it is essential to pay attention to the histogram, a graphical representation of the tonal distribution in an image. The histogram displays the distribution of brightness levels, with shadows on the left and highlights on the right. By analyzing the histogram, you can determine if the image is properly exposed or if adjustments need to be made.
Ideally, you want the histogram to be well-distributed, with no significant spikes on either end. If the histogram is skewed towards the left, it indicates that the image is underexposed, with a lack of detail in the shadows. Conversely, if the histogram is skewed towards the right, it indicates that the image is overexposed, with a loss of detail in the highlights. By adjusting the exposure compensation accordingly, you can achieve a more balanced histogram and a well-exposed image.
Another important consideration when using exposure compensation is the metering mode. Metering modes determine how the camera measures the light in a scene to calculate the exposure. The most common metering modes are evaluative, center-weighted, and spot metering. Each mode has its strengths and weaknesses, and understanding their differences will help you make more accurate exposure adjustments.
In evaluative metering mode, the camera analyzes the entire scene and calculates the exposure based on various factors, such as brightness and contrast. This mode is suitable for most situations, but it may struggle with high-contrast scenes. Center-weighted metering mode, on the other hand, gives more weight to the center of the frame, making it ideal for portraits or subjects with a significant contrast difference from the background. Spot metering mode measures the exposure based on a small area in the center of the frame, allowing for precise exposure adjustments.
Mastering exposure compensation is a crucial step towards achieving proper exposure in photography. By understanding dynamic range, analyzing the histogram, and considering the metering mode, photographers can effectively balance highlights and shadows in their images. With practice and experimentation, newbies can develop a keen eye for exposure and capture stunning photographs that truly showcase their artistic vision.
1. What is proper exposure in photography?
Proper exposure in photography refers to achieving a balanced and accurate representation of light and dark areas in an image.
2. Why is mastering proper exposure important for photographers?
Mastering proper exposure is crucial because it helps photographers capture images with accurate colors, details, and tonal range. It allows for better control over the mood and atmosphere of the photograph.
3. What are some essential tips for new photographers to master proper exposure?
- Understand the exposure triangle, which consists of aperture, shutter speed, and ISO settings.
- Use the camera's light meter to gauge the exposure levels and make adjustments accordingly.
- Experiment with different exposure modes, such as manual, aperture priority, or shutter priority, to gain more control over the exposure settings.
In conclusion, mastering proper exposure in photography is essential for newbies to improve their skills and capture high-quality images. By understanding the exposure triangle, utilizing the histogram, and experimenting with different exposure settings, photographers can achieve well-balanced and visually appealing photographs. Additionally, practicing with different lighting conditions and using exposure compensation can further enhance the overall exposure of the image. With time, patience, and continuous learning, new photographers can develop their exposure skills and create stunning photographs.